Staging Area Floor Marking Workflow for Warehouses
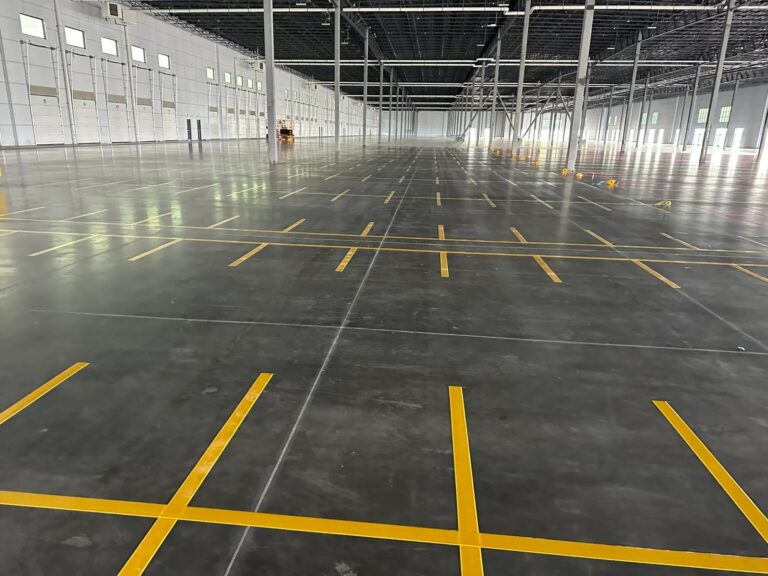
A disorganized staging area doesn’t announce itself with a warning. It shows up as a forklift bottleneck near dock doors, a pallet dropped in a pedestrian corridor, or a pick team working around unlabeled floor space because nobody can tell what belongs where. A well-executed staging area floor marking workflow fixes all three problems at once. It’s the operational foundation that separates a facility running at capacity from one constantly fighting its own layout. This guide walks you through every phase: planning, material selection, installation, and post-installation validation.
Table of Contents
- Key Takeaways
- Your staging area floor marking workflow starts with a plan
- Selecting materials and executing the installation
- Post-installation validation and ongoing maintenance
- Common mistakes that undermine your workflow
- My take: the workflow is the work
- Get professional staging area marking done right
- FAQ
Key Takeaways
| Point | Details |
|---|---|
| Plan before you mark | Map traffic flow, dock locations, and congestion points before placing a single line. |
| Match materials to conditions | Tape suits flexible layouts; epoxy paint serves permanent, high-traffic staging lanes better. |
| Start with highest-risk zones | Mark pedestrian routes, dock staging areas, and forklift lanes first to reduce accidents fast. |
| Validate after installation | Observe real-world adherence for weeks post-installation and collect operator feedback before expanding. |
| Maintain on a schedule | Faded or peeling markings create as much confusion as no markings. Schedule inspections quarterly. |
Your staging area floor marking workflow starts with a plan
Before a single piece of tape touches concrete, you need a clear picture of how your facility actually operates. Not how you think it operates. How it actually operates during a peak receiving shift.
Start by walking the staging area with a clipboard during your busiest window. Note where forklifts turn, where pallets get parked informally, and where foot traffic crosses powered equipment paths. These observations are your baseline. The warehouse floor marking process only produces lasting results when it’s grounded in real traffic data, not assumptions from a blueprint drawn five years ago.
From that walk, you can identify the critical zones that need marking first:
- Dock staging lanes adjacent to dock doors for inbound and outbound pallet queues
- Forklift travel aisles with enough width to meet safe operating clearances
- Pedestrian corridors physically separated from powered equipment paths
- Emergency access zones around exits, fire suppression equipment, and first aid stations
- Keep-clear buffer zones where pallets must never be staged
OSHA 29 CFR 1910.176(a) requires permanent aisles and passageways to be marked and kept clear, but it does not prescribe specific colors. That gives you flexibility. Most facilities adopt a 5S color scheme because it creates a shared visual language across shifts and departments.
| Zone type | Recommended color | Purpose |
|---|---|---|
| Forklift travel aisles | Yellow | Powered equipment only |
| Pedestrian walkways | Green or white | Foot traffic routes |
| Staging lanes | Blue | Temporary pallet placement |
| Keep-clear/emergency | Red and white stripes | No storage, no obstruction |
| Hazard zones | Orange | Caution, limited access |
Risk-based marking tells you to prioritize pedestrian routes, dock staging, and emergency access before anything else. That’s the right sequence. Get safety zones marked first, then layer in efficiency-focused designations as the project expands.
Pro Tip: Before finalizing your color scheme, confirm whether your facility already has any legacy colors in use. Introducing conflicting meanings for the same color across zones is a common source of worker confusion and takes months to undo.
A phased rollout starting with the highest-disruption zones allows pilot testing and feedback gathering before site-wide application. Your receiving and buffer zones near dock doors are almost always the right starting point.
Selecting materials and executing the installation
Once you have your layout plan, the next decision is material. The choice between floor marking tape and painted epoxy affects your installation timeline, operational downtime, and how long the markings last before they need attention.
| Factor | Floor marking tape | Epoxy paint |
|---|---|---|
| Durability | 6 to 18 months in high traffic | 2 to 5 years with proper prep |
| Installation downtime | Minutes per line, no cure time | 12 to 24 hours walking; 72-hour full cure |
| Best for | Flexible layouts, frequent changes | Permanent, high-traffic staging lanes |
| Surface requirement | Clean, dry, and debris-free | Clean, dry, sometimes ground for adhesion |
| Layout flexibility | High, easily repositioned | Low, removal requires grinding |
Selecting the right material depends on traffic volume, floor condition, and how frequently your layout changes. If your staging configuration shifts seasonally or with client mix, tape gives you the ability to adapt without a full re-striping project. If your dock doors and staging lanes have been in the same positions for years and will stay that way, epoxy is a better long-term investment.
Here is the step-by-step installation sequence for a staging area marking project:
- Clean the surface thoroughly. Sweep, vacuum, and degrease the concrete. Surface preparation is non-negotiable before paint application. Skipping this step is the single most common cause of early paint failure.
- Snap chalk lines or use a laser layout tool to mark the planned line positions before applying anything permanent. This lets you verify spacing before committing.
- Mark pedestrian and emergency zones first. Keeping those clear of staging equipment during installation matters.
- Apply tape or paint in sections, working from dock areas outward. Avoid creating large blocked zones across the entire facility at once.
- For tape: apply firm edge pressure across the full length of each line. The edge is where failure begins under forklift traffic. Industrial-grade tape with beveled edges extends service life significantly.
- For paint or epoxy: apply in thin, even coats and enforce the curing window strictly. Traffic too soon on wet epoxy destroys adhesion.
- Install staging area signage at key decision points, including color legends posted near dock doors and at aisle entrances.
Staging lane widths matter more than most managers expect. For pallet staging adjacent to dock doors, lanes should be wide enough to fit a standard 48×40-inch pallet plus 6 inches on each side for placement variance. Forklift travel aisles in staging areas typically require a minimum of 11 feet for counterbalance trucks, though your specific equipment may require more.
Pro Tip: Schedule marking installation during a weekend or overnight shift when staging activity is lowest. For epoxy, confirm with your crew that the 72-hour cure window won’t be cut short by a Monday morning receiving surge.

Separating staging lanes visually from forklift travel routes and anchoring them near dock doors prevents congestion and improves throughput. That physical separation, communicated through color, is the single most effective layout move you can make in a dock-adjacent staging area.
Post-installation validation and ongoing maintenance
Installation day is not the finish line. It’s the beginning of a monitoring phase that determines whether the staging area floor marking workflow actually changes behavior.
Start observing the marked area within the first 48 hours of live operation. Watch for these indicators:
- Pallets placed outside designated staging lanes, which signals inadequate lane width or unclear boundaries
- Forklifts crossing into pedestrian corridors, which points to either poor marking visibility or operator habits that need retraining
- Staging lanes filling and overflowing, which reveals capacity planning issues in the original layout
- Workers confused about color meanings, which indicates signage is insufficient
Document what you see. A simple daily log for the first two weeks gives you the data you need to make adjustments before rolling the same layout out to other zones.
Consistent color coding with posted legends and staff training reduces confusion and improves compliance across shifts. That training investment is not optional if you want the markings to hold behavioral meaning. Color without context is just paint.
Schedule your first formal inspection at 30 days post-installation. Assess for tape edge peeling, paint discoloration, and any areas where markings have become obstructed by permanently parked equipment. Then move to a quarterly inspection cadence.
Marking degradation and overlap creates confusion at exactly the zones where clarity matters most. A faded staging lane near a dock door during a high-volume shift is more dangerous than no marking at all, because workers assume the zone is defined when it actually isn’t.
Once the pilot zone performs well for four to six weeks, expand the workflow to adjacent staging areas using the same color scheme and lane standards. Consistency across the facility matters as much as quality in any single zone.
Pro Tip: Ask your forklift operators directly what’s working and what isn’t after the first two weeks. They see the markings from seat level, at speed, across every shift. Their feedback identifies problems that a manager observing from a walkway will never catch.
Common mistakes that undermine your workflow
Even well-planned staging area marking projects run into problems. Knowing where they happen lets you avoid the most expensive ones.
The most frequent issue is marking too much floor space at once. Covering the entire staging area in a single installation weekend overwhelms operators with new information and makes it hard to track what changed. Phased rollouts reduce disruption and give you feedback you can act on before committing to the full facility.
Tape edge failure under forklift turning is another consistent problem. Tape edges are the main point of failure under heavy traffic. Using industrial-grade tape, applying firm edge pressure during installation, and scheduling proactive repairs at the first sign of lift prevents the cascade where one peeling line eventually makes the entire zone illegible.
Several other pitfalls to anticipate:
- Marking overlap from old and new schemes. Removing outdated markings before applying new ones prevents workers from following ghost lines. Professional removal services prevent this problem cleanly.
- Unclear color coding near dock doors. Multiple zone types converge near dock doors. If your colors aren’t clearly differentiated and supported by signs, operators default to their own judgment. That produces the congestion the markings were supposed to solve.
- No plan for seasonal layout changes. If your staging configuration shifts for peak seasons, decide upfront whether you’ll use tape for flexible zones and paint for permanent ones. A hybrid approach handles this well.
- Emergency access zones blocked by equipment. Striped red-and-white markings on keep-clear zones must be reinforced with signage and physical barriers if operators routinely ignore them.
Pro Tip: When marking dock staging areas, also mark what happens when lanes are full. A clearly designated overflow area with its own color prevents the informal habit of pushing pallets into travel aisles.
My take: the workflow is the work
I’ve watched a lot of managers approach floor marking as a one-day project: get the crew in, apply the lines, move on. The facilities that see real results treat it as a multi-week process with observation built in.
What I’ve found is that the first two weeks after installation reveal more about your actual workflow than any pre-project analysis can. Operators adapt, find shortcuts, and expose gaps in the original plan. If you’re not watching during that window, you miss the chance to fix things before they become permanent habits.
I’m also skeptical of full-facility marking projects that try to solve everything at once. The phased approach isn’t just logistically easier. It produces better layouts because you’re refining each zone with real data before committing to the next.
The other thing worth saying plainly: material choice matters less than maintenance discipline. I’ve seen epoxy floors degrade into illegibility within a year because nobody scheduled touch-ups. And I’ve seen tape floors stay crisp for two years because operators were trained to report edge lift immediately. Your facility’s marking durability is mostly a function of how seriously you treat inspection and repair, not which product you chose on installation day.
The floor marking projects that actually change how a warehouse operates share one thing in common: the people doing the work consulted the people using the floor before, during, and after installation. That’s not a soft principle. It’s the reason the markings get respected instead of ignored.
— ET
Get professional staging area marking done right
If your staging area still runs on informal habits and unlabeled floor space, a professional assessment changes the picture fast. Warehouse Line Striping has completed over 10,000 floor marking projects across warehouses and distribution centers nationwide. Their team handles layout planning, OSHA-compliant color coding, surface preparation, and installation using industrial-grade epoxy coatings that last three to seven years under heavy forklift traffic.
Whether you need dock staging lanes marked from scratch or a full facility re-striping after a layout change, Warehouse Line Striping tailors every project to your specific traffic patterns and compliance requirements. Their 24/7 support and professional removal services mean outdated markings never stand in the way of a clean install.
Explore nationwide service coverage or contact Warehouse Line Striping directly to schedule a consultation for your staging area.
FAQ
What does a staging area floor marking workflow involve?
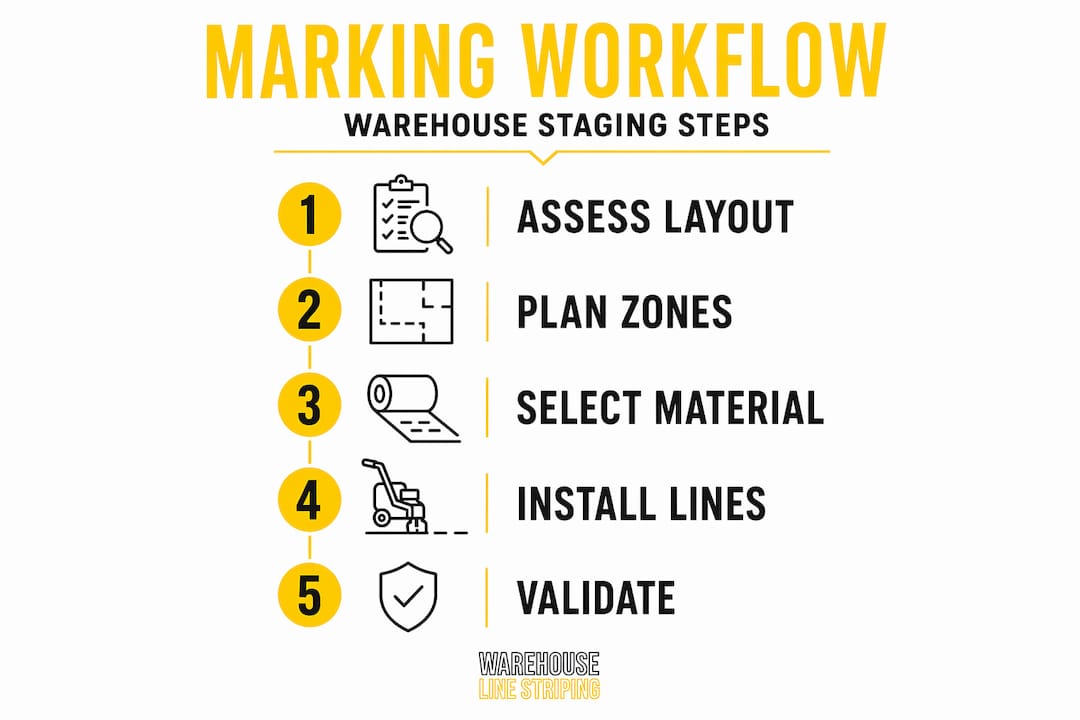
A staging area floor marking workflow covers four phases: layout assessment, material selection, physical installation, and post-installation monitoring. Each phase builds on the previous one to produce markings that hold up under real operating conditions.
How long do staging area floor markings typically last?
Floor marking tape lasts 6 to 18 months in high-traffic staging areas, while epoxy paint lasts 2 to 5 years with proper surface preparation and maintenance. Durability depends heavily on traffic volume, surface prep quality, and how consistently you schedule inspections and touch-ups.
What colors should staging area floor markings use?
OSHA does not mandate specific colors, but most warehouses follow 5S conventions: yellow for forklift aisles, green or white for pedestrian paths, blue for staging lanes, and red-and-white stripes for keep-clear emergency zones. Posting a color legend near dock doors reduces confusion across shifts.
Should I use tape or paint for staging area floor markings?
Tape works better for staging areas that change frequently or need a fast installation without downtime. Epoxy paint suits permanent, high-traffic lanes where long-term durability outweighs layout flexibility. Many facilities use both, applying paint to fixed travel aisles and tape to seasonal or variable staging zones.
How do I know if my staging area markings are working?
Observe pallet placement and forklift behavior in the first two weeks after installation and document any deviations. If pallets consistently land outside marked lanes or forklifts cross into pedestrian zones, the markings need adjustment in width, color contrast, or supporting signage before you expand the layout to other zones.